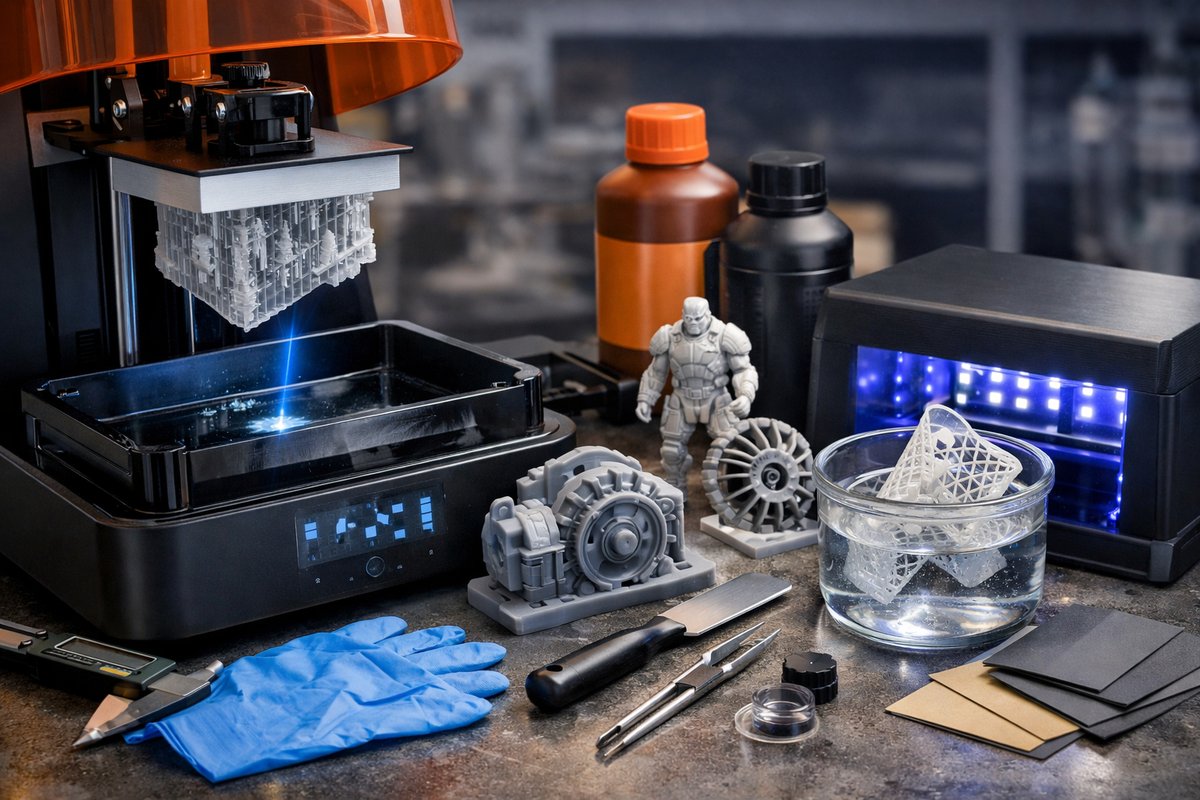

Additive manufacturing has opened new horizons for makers, engineers, and hobbyists alike. Among the various processes, stereolithography (SLA) stands out for its exceptional detail, smooth surface finish, and ability to reproduce fine features with micron-level precision. Unlike filament-based systems, SLA cures photopolymer resin layer by layer using a UV light source, which allows for intricate geometries and sharp edges that require minimal subtraction afterward. In this guide, you’ll explore each phase of SLA printing, discover key components and tools that make the difference between a good print and a great one, and gain practical tips you can apply on your own bench.
SLA vs. Other Additive Methods
By building parts through localized resin curing, SLA bypasses many of the limitations of fused deposition modeling. FDM extrudes thermoplastic through a heated nozzle, often leaving layer lines and requiring mechanical tools for smoothing. Selective laser sintering melts powdered polymer in a fume-generating process that demands complex filtration. In contrast, SLA’s vat of liquid resin uses a controlled UV light to harden each slice. This yields remarkably fine detail and near-zero shrinkage in standard engineering resins. It also simplifies support structures: they’re thinner, break away more cleanly, and leave subtle marks that can be polished out with minimal effort.
Essential Equipment and Materials
To begin, you’ll need a desktop SLA printer, a resin vat with interchangeable FEP film, and a build platform that locks into place with repeatable accuracy. Choose a printer that delivers a stable LED or laser light source at the wavelength specified by your resin supplier-usually around 405 nanometers. A heated build chamber can reduce resin viscosity in cooler environments, but it’s optional if you maintain ambient temperatures above 20 °C. Beyond the core printer, a sealed vat of compatible photopolymer resin, disposable build plates, and a spill tray for safe handling are must-haves. Supplement these with safety equipment: nitrile gloves, chemical-resistant goggles, and a fume-management enclosure or well-ventilated workspace.
Selecting the Right Resin
Resin choice is critical. Standard photopolymer resins balance detail and strength, delivering smooth finishes ideal for concept models, dental molds, or jewelry prototypes. Engineering resins add heat resistance, toughness, or flexibility, allowing functional tests and end-use parts. Biocompatible formulas support medical device prototyping, while castable resins burn out cleanly for investment casting. When selecting resin, consider layer thickness tolerance (typically 25-100 microns), elongation at break, and Shore hardness ratings. Test small calibration prints to verify that cured layer height aligns with your slicer settings and that cured parts withstand your intended load conditions.
Preparing and Slicing Your Model
Begin by importing your CAD file into SLA-compatible slicing software. Orient the part to minimize support contact on critical surfaces: vertical walls produce straighter layers, while sloped or curved faces can help supports peel away more cleanly. Generate tree-style supports for delicate overhangs and use contact settings that create tiny touchpoints, easing post-print removal. Set layer thickness according to the resin’s datasheet-thinner layers yield smoother finishes but extend build time. Adjust exposure and lift speeds to avoid suction forces that can detach the print or damage the FEP film. Always preview cross-sections to identify potential weak spots and adjust support density accordingly.
Printer Calibration and Leveling
Consistent part quality hinges on a well-calibrated machine. Start with a freshly leveled build platform: loosen the thumbscrews, lower the platform to the zero position, and gently tighten until a single sheet of standard office paper slides between the platform and film with light resistance. Replace the film if you notice cloudiness or small scratches that scatter UV light. Run a small test print-a calibration coupon or a standardized accuracy model-to confirm that the first layer adheres evenly. If you see over-cured patches or partial detachment, fine-tune exposure times and platform leveling until you achieve uniform adhesion across the build area.
Printing Process Monitoring
Once the print starts, monitor the first few layers closely. The initial layers anchor the part to the build platform, so watch for uniform paint-film contact and stable Z-axis movement. After those layers, you can leave the machine to proceed automatically for longer jobs. That said, periodic checks for resin debris or cured flakes are wise. Small cured particles can produce false supports in later layers. Using a resin filtration funnel to recirculate resin back into the vat keeps your medium clean and prevents defects. Keep extra FEP film sheets on hand to swap out between batches-this simple step can save hours of rework down the line.
Initial Post-Processing: Washing and Support Removal
When the print completes, gently raise the platform and use a plastic scraper to separate the part from the build plate. Transfer the part to a wash station filled with high-purity isopropyl alcohol. Agitate for two to five minutes to dissolve uncured resin. Longer dwell times may be necessary for thick or intricate models but avoid soaking for more than 15 minutes to protect fine features. After washing, let the part air dry or use compressed air to clear alcohol from crevices. Snap off supports by hand; if they resist, use flush cutters or a carbide scraper for precise removal behind the contact point. Save supports for recycling if your resin supplier offers a reclaim program.
Final Curing for Dimensional Stability
Just-washed parts retain residual monomers that can continue to cure in daylight. To lock in precise dimensions, place the parts in a UV curing station. Orient them at an angle to allow even light exposure on all faces. A timed cycle of five to ten minutes on each side ensures full polymer cross-linking, which improves mechanical properties and hardness. Curing trays with reflective interiors distribute UV evenly and reduce spot curing. Avoid plastic or acrylic enclosures that filter UV wavelengths-opt for purpose-built chambers with clear outlets at 405 nanometers. When complete, the part should feel uniformly rigid, with no tacky areas.
Precision Finishing with Specialty Bits
Even with minimal support marks, a polished surface elevates the professional look of your print. Mount a diamond or carbide burr set in a rotary tool to gently sand down contact points and layer inconsistencies. Work with light pressure and use a fine grit bit to feather transitions. For recessed channels or internal features, swap to conical or ball-end bits, which allow controlled material removal in tight spaces. Keep a dust extraction nozzle close by or work in a ventilated area to capture airborne particulates. Follow up with a micro-abrasive pad or polishing wheel to achieve a matte or high-gloss finish, depending on your design intent.
Dimensional Verification and Tolerances
After finishing, confirm critical dimensions with digital calipers. Measure bore diameters, wall thicknesses, and mating surfaces against your CAD specifications. Photopolymer resins exhibit minimal shrinkage but may expand slightly with excessive curing. If you find parts consistently oversized or undersized, adjust your slicer’s XY compensation settings or tweak layer exposure times. Document these offsets for future prints so that your first iteration is always within tolerance. This habit reduces trail-and-error cycles and shortens time to a perfect fit when designing complex assemblies.
Safety and Workspace Best Practices
Handling liquid resin and alcohol requires caution. Always don nitrile gloves and safety glasses to prevent skin contact and eye irritation. Store resin bottles upright in a cool, dark cabinet between builds. Dispose of used alcohol and resin scraps according to local hazardous waste regulations. Work inside a dedicated enclosure or under a fume hood to capture odor and volatile compounds. Clean spills immediately with absorbent pads and store cleaning tools separately from general household items. Label containers clearly and keep a spill kit within reach for emergencies.
Optimizing for End-Use Durability
Once you’ve mastered dimensional accuracy and surface finish, explore resin additives that enhance mechanical performance. Glass beads can improve stiffness in thin walls, while flexible modifiers yield impact-resistant parts. For outdoor applications, select UV-stable resins or apply a clear coat to block yellowing. Primer and paint bond better to fully cured surfaces; use adhesion promoters if you plan to apply specialized coatings or conductive paints. Test small sample coupons in real-world conditions before committing to large assemblies, and note any variations in surface energy that might affect paint adhesion or bonding with secondary materials.
Next Steps: Scaling Your SLA Workflow
With foundational skills in place, expand your workflow by integrating batch queues in your slicer, experimenting with dual-resin setups for multi-material prints, or adding a secondary finishing station equipped with a micro-sandblaster. Some users invest in automated resin exchange systems to switch between clear and engineering resins on the fly. For design teams, cloud-based print queue management and remote monitoring cameras can accelerate collaboration. However you choose to grow, the core principles-resin selection, machine calibration, careful support strategies, and diligent post-processing-remain the cornerstones of high-precision SLA fabrication.
Practicing these steps will not only yield stunning prototypes but also set the stage for true production-quality parts. Whether you’re making intricate jewelry models, functional mechanical components, or fine art reproductions, mastering SLA opens the door to a new level of additive craftsmanship. Gather your tools, stock up on resin, and get ready to watch your digital designs materialize in striking detail.