A Symphony of Layers
3D printing-often called additive manufacturing-builds objects layer by layer, transforming digital models into physical reality. What began as a specialized prototyping process has grown into an accessible craft used by educators, hobbyists, engineers, and artists. From desktop machines humming quietly in home offices to industrial systems forging metal components, the core principle remains the same: deposit material along precise paths under computer control. As you embark on your 3D printing journey, you’ll discover that technology choices, material selections, and finishing workflows all shape the final outcome. This guide offers modular insights on choosing the right device, mastering filament and resin types, assembling a versatile toolkit, and refining techniques that elevate prints from good to gallery-worthy.
Choosing Your 3D Printer Compass
At the center of every additive workshop is the printer itself. Broadly speaking, desktop machines fall into two major categories: fused deposition modeling (FDM) and vat polymerization (commonly known as resin or SLA). FDM systems extrude thermoplastic filament through a heated nozzle, building parts from polylactic acid (PLA), acrylonitrile butadiene styrene (ABS), PETG, and other filaments. They excel at durability, affordability, and material recycling. SLA printers cure photosensitive resin with a UV light source, yielding ultra-smooth surfaces and fine detail-ideal for jewelry prototypes, dental models, and miniatures. A careful assessment of build volume, layer resolution, ease of calibration, enclosure quality, and safety features will steer you toward the best fit. Open-frame FDM machines encourage experimentation but may require more tinkering, whereas enclosed, plug-and-play units streamline temperature control and fume management.
Materials as the Palette
Every filament and resin behaves like its own medium, each with unique strengths. PLA is a biodegradable, user-friendly option that prints at moderate temperatures and resists warping. ABS offers toughness and heat resistance but can emit stronger odors and needs a heated chamber to prevent curling. PETG blends PLA’s ease with ABS’s resilience, producing parts that resist moisture and stress cracks. Flexible filaments such as TPU enable bendable gears, seals, and wearable prototypes. Specialty filaments-wood-filled, metal-infused, conductive, or glow-in-the-dark-add aesthetic or functional flair. On the resin side, standard formulas deliver glass-like clarity or matte finishes. Tough-grade resins simulate engineering plastics for stress testing, while dental and castable resins cater to highly regulated professional fields. Keep in mind sustainability: recycling initiatives for PLA scraps, safe disposal protocols for used resins, and sourcing from manufacturers who prioritize eco-friendly packaging and bio-based formulations.
Tools of the Trade
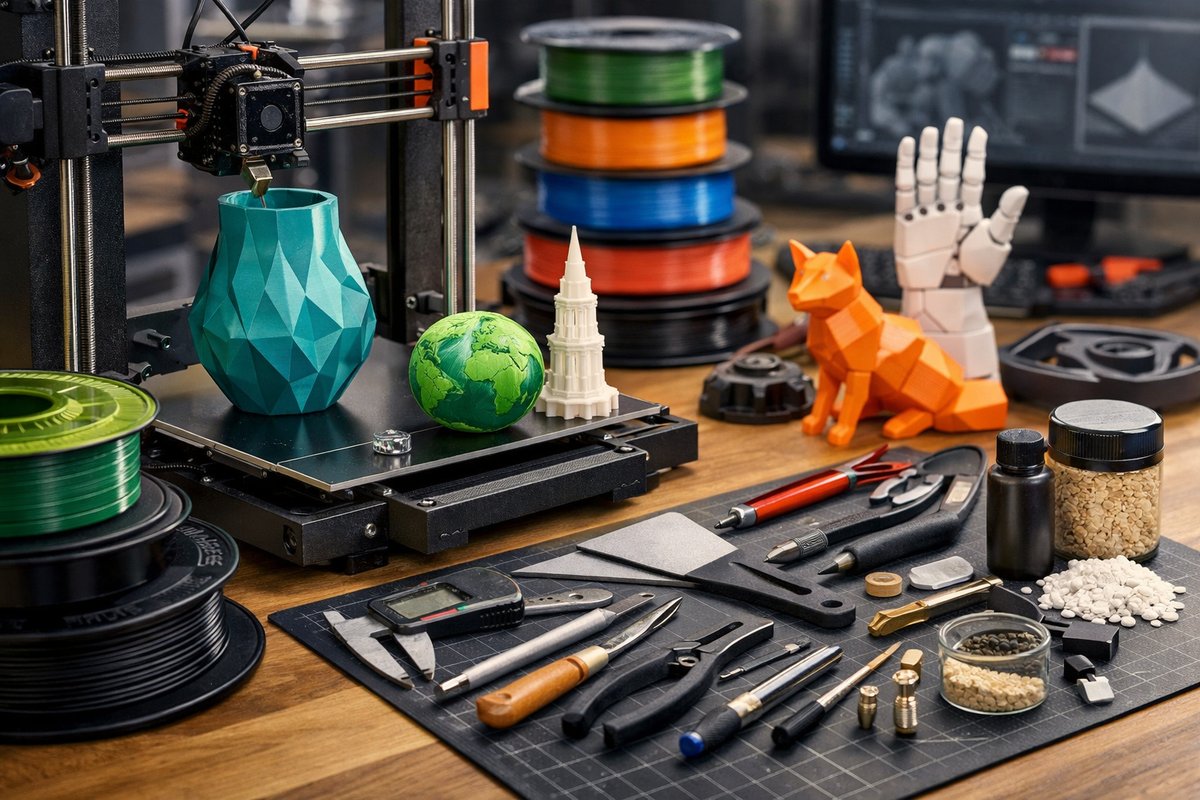
Beyond the printer and material spools, a curated workshop arsenal accelerates success. A digital caliper ensures precise measurements on finished parts and in-software adjustments. Flexible build surfaces or magnetic plates simplify print removal without risking nozzle strikes or bed damage. Bed leveling tools-from manual feeler gauges to automatic mesh-leveling sensors-help maintain the perfect first layer for adhesion. Cleaning is crucial: nylon brushes, isopropyl alcohol, and lint-free cloths keep build plates and resin vats pristine. A sturdy set of flush cutters and precision tweezers trims supports, while hobby knives tackle fine post-print cleanup. In resin setups, protective gloves, nitrile masks, and designated curing stations safeguard health and assure complete polymerization. Each item complements others to create a smooth, repeatable workflow that preserves prints and reduces wasted material.
Crafting Techniques
Mastering 3D printing is as much about process as hardware. Start with slicing software calibration: adjust nozzle and bed temperatures, fan speeds, layer heights, infill densities, and support strategies to suit your model’s geometry. Lower layer heights produce finer detail but increase print time; strategic infill patterns balance strength with filament savings. Bridge settings, retraction distances, and print speeds can mitigate stringing or drooping features. Experimentation is key: printing calibration cubes, overhang tests, and benchy boats reveal how your machine and material will perform under different settings. When tackling intricate overhangs or negative curves, generate custom support structures rather than relying solely on automatic placements. Manual supports often peel away cleaner and use less material when positioned thoughtfully.
Post-Print Mastery
Once your part emerges from the build plate, the journey continues. FDM prints benefit from sanding with ascending grit papers-starting around 200 grit and progressing to 600 or higher-to smooth layer lines. A heat gun gently eliminates micro-burrs and can help blend plastic ridges. Resin parts require an isopropyl alcohol bath to remove uncured resin, followed by a final UV curing step to fully harden the surface. For both processes, painting and finishing techniques breathe life into the object: primer coats hide minor imperfections, while acrylic paints, spray enamels, or specialized airbrush colors deliver rich hues. Clear coats-matte, gloss, or satin-seal surfaces against UV degradation and fingerprints. For metal-infused prints, polishing compounds reveal a metallic sheen, and patina solutions create aged or oxidized effects.
Practical Troubleshooting
Every maker encounters hiccups. Warping edges often signal bed adhesion issues-adjust build plate leveling, raise nozzle proximity, or switch to adhesion aids such as glue stick or specialized tape. Under-extrusion (gaps in layers) can stem from clogged nozzles, filament moisture, or incorrect extrusion multipliers. Over-extrusion (bulging seams) calls for flow rate reduction and temperature tweaks. In resin printing, layer separation suggests insufficient adhesion to the build platform-clean surfaces, increase exposure time, or fine-tune peeling forces. Keeping a print log with date, material lot number, and slicing settings helps trace patterns and prevents repeating errors. A curious mindset, patience, and systematic testing form the backbone of consistent improvements.
Privacy, Community, and Sustainable Practices
3D printing communities thrive on open exchange, but protecting intellectual property remains important. If you’re printing designs sourced online, verify licensing terms and respect attribution requirements. For proprietary prototypes at home or in a small business, consider offline slicing tools or encrypted firmware to safeguard files. Sustainability also extends to responsible waste management: recycle failed prints and support filament take-back programs. Explore compostable PLA blends and bio-resins derived from plant sources. Engage with local makerspaces or educational programs to share resources, reduce individual carbon footprints, and foster curiosity-driven collaboration.
Charting the Next Frontier
As hardware becomes more affordable and materials increasingly advanced, boundaries continue to blur between rapid prototyping and end-use manufacturing. Multimaterial machines can print rigid, flexible, and conductive elements in a single build. Hybrid systems merge subtractive milling with additive layering for precision parts. Emerging polymer and metal powders, alongside ceramic slurries, enable applications in aerospace, dentistry, and even culinary arts. Open standards for file formats, cloud-based collaboration platforms, and AI-driven slicing promises to lower the entry barrier further, empowering more people to shape reality, one layer at a time. Whether you’re optimizing your first PLA print or exploring industrial resin formulations, the fundamentals of careful calibration, thoughtful material choice, and creative finishing remain your compass on this ever-evolving journey.