Modern 3D printing has evolved into a versatile toolset that empowers makers, educators, and engineers alike. At its core are the choices of materials and the methods used to shape them. Understanding these foundations unlocks consistent, high-quality results regardless of whether the goal is rapid prototyping or crafting intricate art pieces. In this guide, readers explore both fused deposition modeling and resin-based systems. They learn how to prepare filaments or photopolymers, calibrate machines, apply advanced materials, and perform post processing to achieve a flawless finish.
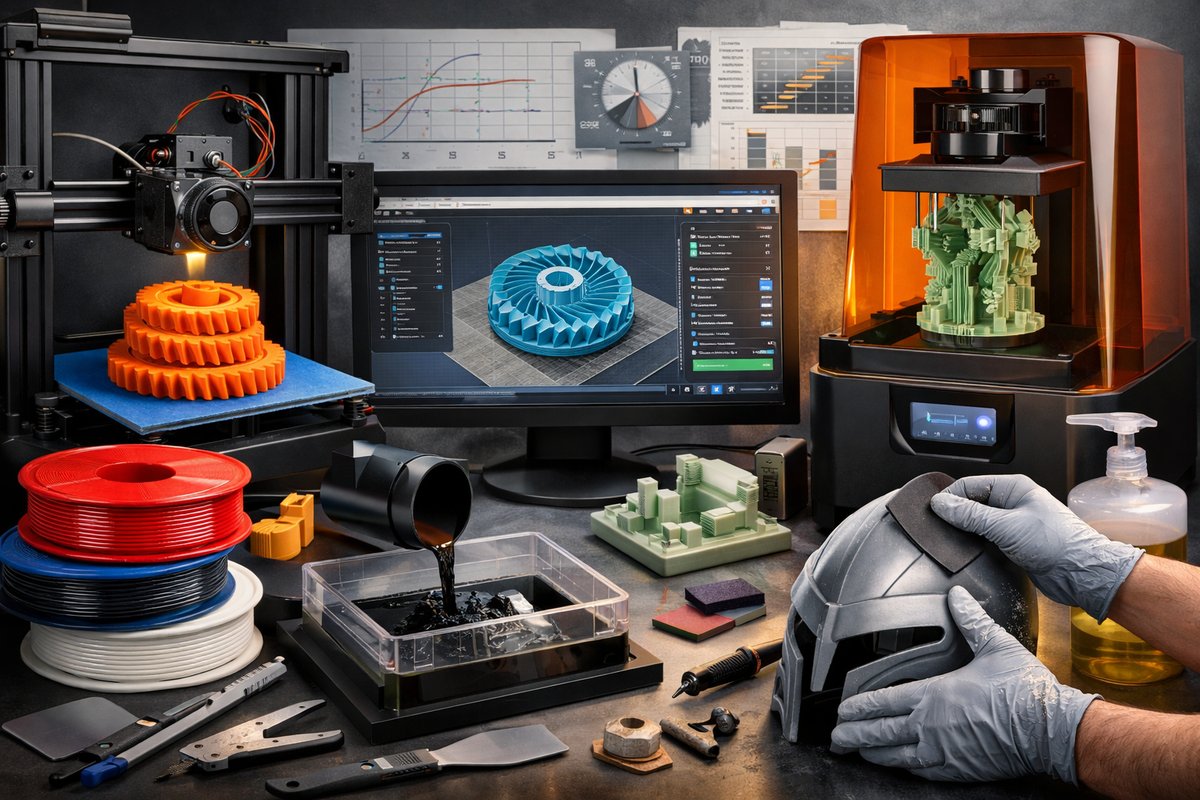
Fused deposition modeling, often abbreviated as FDM, remains one of the most accessible and widely used methods of 3D printing. FDM printers work by melting a thermoplastic filament and depositing it layer by layer onto a heated build surface. This technique excels in producing functional parts that exhibit good mechanical strength and design freedom. Beyond basic operation, mastering FDM involves tuning parameters such as nozzle temperature, layer height, print speed, and cooling.
Selecting the right filament is the first vital step toward successful FDM printing. Polylactic acid, or PLA, offers low warpage, minimal odor, and ease of printing. It suits beginners and general-purpose projects. Acrylonitrile butadiene styrene, or ABS, delivers higher impact resistance and temperature tolerance, but requires a heated chamber or enclosure to prevent layer splitting. Polyethylene terephthalate glycol, known as PETG, blends strength with ease of use, resisting both chemicals and moisture while retaining good layer adhesion. Each of these filaments benefits from specific temperature ranges, cooling settings, and build plate adhesives.
A careful setup and calibration routine can reduce frustration and wasted material. Begin by cleaning and preparing the build plate using isopropyl alcohol or a dedicated adhesion sheet. Level the bed manually using adjustment knobs or leverage an assisted mesh bed leveling feature if available. Heat the nozzle and build plate to filament recommended values, then extrude a small line of material across the surface to confirm consistent flow. Fine tune the Z offset so that the first layer adheres with slight squish into the plate. Finally, run a calibration cube or dimensional test part to verify dimensional accuracy and detect under extrusion or over printing.
For projects demanding higher performance or unique textures, composite filaments and specialty blends extend the possibilities of FDM. Carbon fiber reinforced nylon offers exceptional stiffness and strength, ideal for end-use mechanical parts. Wood-filled PLA delivers a grainy visual effect, perfect for decorative objects that emulate timber. Metal-infused filaments embed bronze, copper, or stainless steel particles for a weighted, lustrous finish after polishing. These materials often require hardened steel nozzles, adjusted extrusion multiplier, and slower print speeds to ensure reliable feeding and prevent abrading softer nozzles.
On the opposite end of the spectrum, stereolithography or SLA printing harnesses a light sensitive resin cured by a precise light source. SLA systems are prized for delivering parts with extremely fine resolution and smooth surface quality. Advantages include the ability to capture sharp overhangs, thin walls, and intricate lattice structures that can challenge FDM. To master resin-based techniques, operators must respect safety measures when handling liquid photopolymers and invest in proper ventilation or protective equipment.
Resin selection plays a critical role in SLA success. Standard resin formulations yield crisp detail and smooth surfaces suitable for miniatures and small-scale prototypes. Tough or engineering grade resins simulate impact resistant plastics and serve in functional testing applications. Flexible resins behave like elastomers, bending under load before returning to shape. Castable resins burn out cleanly, making them invaluable to jewelry and investment casting workflows. Each resin type presents unique exposure times, layer thicknesses, and mixing protocols.
Setting up an SLA print entails preparing the resin vat, leveling the build plate, and calibrating exposure. Begin by gently stirring or inverting the resin bottle to ensure homogeneity, then pour into the vat without exceeding recommended fill lines. Level the build platform by loosening screws, lowering it to touch the vat film, then tightening securing bolts. Use a test exposure model to dial in optimal layer exposure and bottom layer parameters. Monitoring the first few layers ensures proper adhesion before committing to longer prints.
Slicing strategies and support placement are fundamental steps for both FDM and SLA processes. Orient parts to minimize overhangs and reduce the number of supports in critical aesthetic areas. Employ brims or rafts on FDM prints to anchor small bases, while using tree or block supports in resin printing to preserve fine details. Adjust support density, tip size, and build orientation to strike a balance between ease of removal and secure part stabilization during printing.
Once the print is complete, post processing transforms raw prints into polished final products. For FDM parts, gently remove supports using flush cutters or pliers, taking care not to damage delicate features. Sand support scars with progressively finer grit sandpaper, then apply a smoothing technique such as chemical vapor bathing for ABS or filler primer and sanding for PLA. Painting or sealing with a spray lacquer can enhance appearance and durability.
Resin printed parts require washing in isopropyl alcohol or a specialized cleaning solution to remove uncured resin from surfaces and crevices. After washing, allow parts to air dry before placing them in a UV curing station or under a UV lamp. Proper curing stabilizes the part, increasing strength and reducing tackiness. Light sanding and polishing can remove layer lines, while painting with resin compatible primers yields vibrant, detailed results.
Inevitably, challenges will surface in any 3D printing journey. Warping and lifting in FDM often traces to inadequate bed adhesion or insufficient enclosure temperature control. Solutions include using adhesive aids, adjusting bed temperature, or enclosing the printer to maintain ambient warmth. Stringing can be mitigated by fine tuning retraction distance and speed, as well as nozzle temperature. In resin systems, failed layers frequently point to dirty vat films or incorrect exposure settings. Regular maintenance of the vat film and recalibration of exposure can rectify these issues.
Sustainability and material recycling contribute to a responsible printing practice. Failed or support waste from filament prints can be processed through filament shredders and extruders to reclaim material. Many hobbyists use bury and compost methods for biodegradable PLA waste. Resin excess should be cured fully before safe disposal, and used resins often qualify for hazardous waste recycling programs. Adopting these practices reduces environmental impact and fosters a more mindful workflow.
Whether exploring material science, refining calibration workflows, or innovating new composite blends, the path to reliable and artistic 3D printing rests on a deep understanding of the interplay between machine, material, and method. By following consistent preparation steps, embracing post processing routines, and reacting to failures with curiosity, makers can transform raw digital designs into tangible reality. The skills honed in this process lay the foundation for continuous experimentation and ever more ambitious projects.
No affiliate links found for this post.